Monday, 14 October 2013

Cowboy Up or go sit in the Truck

'Project Wall crag' at Rifle 
Rifle wasn't on our original American road trip plan, I actually hadn't even heard of it before.  But I had emailed some climbing buddies that I knew had done climbing trips to the US and Rifle was one of the spots recommended.  So of course I jumped on Google to check if it appealed to me, and to see if it would be feasible to include in our trip.


Rock and sunshine ... heaven ;)
Rifle is in Colorado, 200 miles directly east of Boulder.  The town is pretty small, but the climbing is big :) It's all situated in Rifle Mountain Park, roughly 12 miles out of Rifle town.  The park is basically a narrow gorge (varying from 50m to a maximum of 100m wide) with a single dirt road running all the way through.  Both sides of the gorge are lined with stunning limestone rock faces, with varying degrees of angle and difficulty and height.  A river runs down the gorge too, frequently meandering from one side to the other. The crags run on both sides of the gorge with so many routes to choose from, and so much potential for even more development.

Porta-potti luxuaries
The park is extremely well maintained, and offers rustic camping (no showers or water supply), picnic tables and chairs, and porta-pottie toilets at every parking pullout (of which there are many and close by to each other).  You do pay for these luxuaries though at a cost of $7 a day park fees.  However if you are staying for more than 4 days then get an annual pass which is only $30.

Belaying in style 1 meter from the road - Project Wall crag
Rifle has by far the shortest walk-ins I have ever experienced in my 14 years of climbing!! The longest walk-in that we had to endure was probably as much as 200 meters (all flat), and the shortest was 3 meters (there are actually signs at the crag saying you are not allowed to belay out of your car :).  The biggest novelty of all is walking just a few meters from the crag to a porta-pottie for a luxuary toilet experience! Never before have I sat on a proper toilet while at a climbing crag :) 

Rone Thompson on Irie Meditation (5.11d)
Now onto the juicy stuff ... the climbing! Rifle has an awesome selection of routes, lots and then lots more :)  Unfortunately, as is the nature of limestone, many of the routes were pretty polished, some of them to the point of being unpleasant and almost unclimbable (at least not without adding a couple grades to the original number). However that said, there were plenty of non-polished routes to do too, it was just a matter of looking in the right places, and avoiding some of the over-climbed classics.

The style of the climbing varies from crag to crag, but predominantly you looking at an obscene use of kneebars on the steeply overhung routes (bring your kneepad!), with large moves between flat or sloping laybacks. On the vert or off-vert the crimpers start to kick in, but it's still a lot about them laybacks. There are no tufa features on this limestone, and not many pockets either.  For me I definitely needed a bit of time to build up some crimper strength, and to get used to the layback-dominant style of climbing, which often means tricky footwork and off-balance slapping between grips.  It was super fun though, and the routes were all well bolted.

The Royal Seat at Anti-Phill Wall crag
Rifle has a mind-boggling number of 5.13 and 5.14 routes, compared with many other climbing destinations, so if you're cranking those sort of grades you'll be kept well entertained.  But the dominant grade range is 5.12s, with decent selection of 5.11s.  There are limited 5.10s and not much below that, but if you are climbing those grades then there are still sufficient routes for at least a few weeks worth of climbing.

Our campervan which we hired in Los Angeles


I found the grading to be quite solid and you really had to work for a tick.  As I got more familiar with the rock and the style of climbing this did ease up a bit, but the grades still felt pretty hard.  I chatted with a number of other first-time-Rifle'ers from all over the world and it seems to be consensus that Rifle's grading is quite staunch.

However it's not all about the grade, at least not for me, and Rifle offered some really stunning routes with great climbing, so it was just good times!


HOW TO GET THERE
For travel in the US I would definitely recommend a car.  Well, to be honest that's all we used so I couldn't really comment on feasibility of getting around using train and bus.  If you don't have a car, but can manage to get to Rifle town, then it would be possible to hitch out to the park and camp there. There was always climbers around, even mid-week, so you might even manage to hitch a ride into town and back to get supplies.

Feeling da rock in Yosemite National Park
Denver and Salt Lake City are your closest big airports, but there are plenty other options like Las Vegas (we drove there after our climbing in Rifle) and Albuquerque.  You can even fly in to Los Angeles or San Francisco and drive out from there.  We drove out from San Francisco, stopping along the way at Yosemite National Park and Bryce Canyon, both breathtaking spots that I highly recommend seeing!

Our camp at Rifle Gap State Park
WHERE TO STAY
As mentioned above, Rifle Mountain Park offers rustic campsites from which you can walk to the crags.  I think they are only first-come-first-serve, so you cannot pre-book.  Alternatively there are 2 campgrounds to choose from outside of the park: Rifle Gap State Park and Rifle Falls State Park.  

We stayed at Rifle Gap and it was perfect.  Price was $16 for a primitive site, which means no electric or water hookup.  Each site had a picnic table with roof shelter overhead (more for the sun than rain!) and a fire pit. There was running water and treated drinking water, and the showers cost $1 for 4 minutes.

Bryce Canyon National Park - absolutely breath-taking
From what I read on the internet, Rifle Falls State Park is the more popular one for climbers.  However that was fully booked up so we stayed at Rifle Gap instead, so I can't really comment on Rifle Falls except that I'm sure it will be of similar quality to Rifle Gap.  Rifle Falls is about 4 miles from the climbing, and Rifle Gap about 6 miles. The one thing to warn you about is that you have to pay a daily fee for all State Parks in the US.  For Rifle this is $7.  So remember to bear that in mind and add that to your daily camp expense.  However, if you are there for a decent length of time then it's better to get an annual pass which was $60.  

If you have the dosh then there are a number of motels in Rifle, prices ranging from $64 to $99+ a night.  

CLIMBING INFO
The Rifle Mountain Park guidebook by Dave Pegg seems to be the best one out there.  If you're only there for a short time, or if you're traveling like we were and couldn't afford to add another book to an already overweight backpack, then you can get the guidebook on your mobile phone through the Rakkup app.  It's a lot cheaper, especially if you go for the 2-month subscription book at only $9.99. This is what we used and the app was great, with good pictures and descriptions for finding the routes, and good beta on the routes (length, bolts, stars, general features etc). 

Yosemite National Park - To infinity and beyond!
FOOD
There is a large City Market supermarket in Rifle town which has everything you need at good prices, plus a bakery which produces some very tantalizing goodies which maybe you don't need but will definitely want :) The town also has a few liquor stores, laundry, post office, and other bits of bobs.  It's also got a movie theatre and various take-away joints.  

The one thing to note is that you cannot buy any climbing chalk in Rifle. The closest outdoor shop that we found that sold it was in Glenwood Springs, about 30 minutes from Rifle (Summit Canyon Mountaineering).

WHEN TO GO
From what I've heard, Rifle is a popular summer destination crag.  This is because you are guaranteed to be able to find shade no matter what time of the day it is ... with one side of the gorge having shade in the morning and then it moving over to the other side of the gorge for the afternoon.  It's also at a slight elevation so the temperatures are slightly cooler. I'm not actually sure about what conditions are like for the rest of the year, since we were going in summer I just researched that. You'll have to do your own bit of Googling to find out.

Sunday, 14 July 2013

Climbing in Brazil


Famous Christ the Redeemer statue in Rio
Getting information for climbing in Brazil proved to be extremely difficult.  I spent literally tens of hours trawling through the internet trying to piece together details on the sport climbing in Rio De Janerio.  I guess I’ve got to bear in mind that I was being rather picky in looking specifically for single pitch non-slab sport climbing, and that with my somewhat limited knowledge of Portuguese had to rely on semi-legible Google webpage translations.
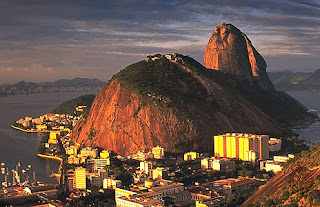
Sugar Loaf, Rio De Janerio
In the heart of the city of Rio De Janerio there is a large amount of slabby multi-pitch granite trad and sport routes, but I really struggled to find stuff that suited my style.  Usually my strategy is to go to an indoor bouldering wall and chat with some of the locals and get my info that way.  What was super surprising is that there are no indoor walls in Rio!  Well, I did find one in the suburb of Botofogo, but as indoor walls go it was pretty dismal.  Perhaps there are some out there, but I spent ages surfing the net and was not successful in finding them.

Keeping in shape while in Rio - monkey bars on Copacobana beach
However, I did speak with a few of the climbers at the Botofogo wall and with their limited English and my limited Portuguese managed to determine that there is some awesome hard sport climbing in the Tijuca National Park, but unfortunately I could not find anywhere that sold the guides books for this area.   One climber did let me take some photos from her personal guide book, but even by combining these with the beta I could find on the internet I was still lacking that one vital bit of information key to any successful day out … HOW to get the crag!  Every online post or guidebook paragraph always assumed I either had a car or was familiar with the park, and the access info would only start from some point totally foreign and totally unreachable to me.

Unfortunately in the end I just couldn’t get enough information to join all the dots and we decided to abandon climbing in Rio and focus instead on Serra Do Cipo.


Serra Do Cipo is in the Minas Gerais province, roughly a 9 hour drive north of Rio.  The closest big town is Belo Horizonte, and one can certainly live a fulfilled and fruitful life without ever having been to this city.  We got a bus from Rio to Belo, and due to the uncoordinated bus times had to stay over in Belo for a night.  8:30am the next day we were back at the bus terminus and on our way to Cipo.

Try putting ‘Serra Do Cipo’ in Google Maps and it won’t find it, instead the town is marked down as being called ‘Cardeal Mota’.  This was the first source of our confusion.  The next came from Google Maps giving the impression that you’re way out in the middle of nowhere, so naturally ones concern is if there are any shops, restaurants, or places for accommodation out in this seemingly-remotest of locations.  But as we discovered when we stepped off the bus, it is actually a quaint little town with a decent supermarket, a sprinkle of restaurants, and loads of pousadas (inns) to choose from. 

Putting in the first clip on 'Herois da resistencia' (7c)
The town is at kilometre 97 on highway MG 010, however the climbing is all closer to the KM100 point, so if you don’t have a car then you’ll probably want to find accommodation further up the road (see below for a list of places to stay).  Since we didn’t know all this beforehand we had booked 3 nights at Pousada Licuri in town.  It is definitely possible to hitch the 3km up the road, or walk if you feeling super energetic, but we decided to use the 3 days to catch up on some much needed R&R (we had just spent 8 days exploring Rio top to toe, inside and out, including of course 5:30am starts for sunrise on Copacobana beach and midnight ends after multiple Caipirinha cocktails, also on Copacobana beach :).  The Serra Do Cipo National Park is close to the town and offers some lovely hikes, rivers, waterfalls and canyons. 

Super breakfast at Pousada Licuri
Before I go any further I need to deviate for a moment from climbing and mention the Brazilian breakfasts … they are scrumptious!  Through our travels in South America we’ve encountered a range of breakfasts – Chile’s standard is scrambled eggs, white bread and maybe a bowl of cornflakes.  Argentina’s was a bowel-clogging plain croissants and white bread.  But Brazil made up for everything that Chile and Argentina lacked with fresh fruit, freshly baked bread, cheesy balls, and cake, granola and fresh fruit juice.  Pousada Licuri laid a spread that even the most hardy diet-conscious couldn’t resist, but much to my surprise our next accommodation further up the road, Pousada Grande Pedreira, put up a damn good fight for the winners position.


Getting ready for the days climbing :)
I could find no reference or link to a printed guide book for Serra Do Cipo, so unfortunately we were once again restricted to what we could find online.  However this website has some fairly comprehensive info on the Group 3 climbing area, and although we were limited to climbing in this area there was still plenty of routes to keep me entertained for the 5 days that we had there.  


The area definitely caters more for the 7a and upwards grade range, with only a very few routes in the 6a-6c+ range.  That said however, I don’t think the online guide we had covered everything in the area, so it’s possible there are a few more out there that we weren’t aware of.  Group 3 does not have hundreds of routes, but where it lacks in numbers it makes up for in quality.  Every route that I climbed I would give top star rating, they were all stunning lines that flowed beautifully.  There are other areas too which we never got to explore, and if they have as many quality lines as at Group 3 then this is definitely an area that could keep you climbing happy for a month. 

QUICK INFO

HOW TO GET THERE

Belo Horizonte has an airport, so if you’ve got the money you could look into flying there.  Otherwise the way for us mere money-mortals is either to hire a car in Rio and drive up, or get a bus from Rio to Belo (Busca Omnibus, companies Util and Cometa).  From Belo you then need to take another bus to Serra Do Cipo. There are 2 bus companies that operate this route - Saritur and Serro – and the journey is roughly 2-3 hours.  The bus destination is actually after Serra Do Cipo, so you just ask the bus driver to drop you off at the ACM (YMCA) at KM100.

WHERE TO STAY

There are loads of pousadas in the town, however if you’re climbing and especially if you don’t have a car then you’ll want to stay up near the ACM at KM100. 

Pousada Grande Pedreira's garden
We stayed at Pousada Grande Pedreira and loved it.  Note however that they were crap at responding to any email queries we sent them, we only managed to book the place once we were physically there.  So if they aren’t replying to your emails then try phoning them.  They have lovely private double & twin rooms with private bathrooms, as well as dorm and camping options.  The setting for this place is stunning, with a beautiful huge garden with flowers, orange trees, swimming pool and luscious green grass.  
Pousada Grande Pedreira
The only downside is that there is no WIFI, but then this is the case with most of the places out here anyway, and they are happy for you to use their computer in the office.  We paid BRL100 (£28) a night for a double room with private bathroom, use of the kitchen facilities, and breakfast included (low season).

Espaco Mandalla Refugio has dorm rooms and one single double room, and WIFI.

2 others that we passed and looked good were Pousada Sitio Xodo and Pousada Quintal Da Serra.

If you’ve got the cash then Pousada Carumbé might be the place for you – a very fancy resort with indoor and outdoor swimming pool, restaurant, massage room and all that kind of extravagant stuff.  It was clearly WAY out of our budget so we didn’t even ask the price.

If you’re looking for accommodation in town then I would definitely recommend Pousada Licuri, it is more on the pricey side but the quality of the accommodation and service it is clear why - we paid BRL200 (£56) a night for a private cottage with breakfast included (no kitchen facilities though).

CLIMBING INFO

This website has sufficient information to get you climbing at the Group 3 area – this is what we used and managed to find our way around.  I couldn’t find any reference or link to a printed guide book covering all the climbing areas, but hopefully there will be one soon!

FOOD

The town has a small supermarket that has a fair selection of fruit, vegetables and staples.  You might not have the range of choice that you’re accustomed to at your local Tescos, but it is definitely enough to get by on.  There is nowhere to buy food out by KM100, so either stock up before you head out or you’ll have to make the 3km walk or hitch into town to get food.  There are a couple of restaurants within walking distance though.

WHEN TO GO

May to October is the dry season for this area, and according to various online sources this is the perfect time to go.  We were there in June and conditions were perfect.


Kiwi 'Kewa

Beach 1.5 hours drive from Mangaokewa crag
I love New Zealand, but unfortunately I gotta say, don't live on the North Island if you're a sport climber! From what I've heard and researched, the South Island is the better spot to be climbing. The North Island has a few crags, mostly dotted around the centre, with some interesting climbing, but I think if I lived here I would run out of stuff to do pretty quickly.

I gathered some crag advice off the climber.co.nz forum, with a few locals giving me key bits of info regarding rock type and accommodation/camping. They also pointed me to an awesome online crag guide site (www.freeclimb.co.nz) which has free downloadable PDF files for pretty much all the north island sport crags!

Our plan was to first try out the crags around Wharepapa South for a few days, and then head over to Mangaokewa crag for a couple more days (unfortunately we didn't all have that much time, hence not getting down to the South Island either).

"The Colosseum" sector, Mangaokewa
Wharepapa South is situated fairly central, about 2 hours drive south of Auckland. The rock is described by locals to be very sharp, but we never got to sample it ourselves.  Contrary to the details given on their website (… your hosts Bryce and Wendy Martin will make you feel at home and their knowledge of this premium climbing area is second to none …), we found Bryce to be rather off-ish and very vague with his information. The campsite turned out to be a small corner of grass on the school grounds, with the facilities less than desirable. The thought of waking up to a school yard full of kids was not quite our idea of enjoyable camping so we ditched that idea. There was the option of wild camping closer to the crag, but unfortunately there was no drinking water supply nearby and we only had two 1 litre bottles with us so it wasn't possible for us to do that either. In the end we decided this place just wasn't speaking to us and we jumped back in the car and continued on south for another hour to Mangaokewa.

'Kewa campsite
Quite the opposite of Wharepapa South, we were immediately smitten with Mangaokewa campsite. It's nestled in a small valley with low lying hills all around and a stream running through. It's a beautifully kept campsite with lots of grassy flat sites, trees, wooden table and chairs and BBQs, and it's totally free! There are no showers, but there are toilets and sink which are cleaned every day, and there is the stream for washing in :)

Washing in the stream :)

Enjoying the morning sunrays
The limestone tuffa'd rock peeks out of the trees along one hillside but it turned out that all of the decent climbing is actually on a lower tier hidden from view behind the trees. We went to the upper tier one day but the rock was extremely crumbly and I didn't have much confidence in the bolts holding.

The majority of the climbing on the lower tier is vert, or just slightly off vertical (20-30 degrees) with small slopey crimps. Since vert and slopers are my biggest weaknesses this crag certainly turned out to be a challenge for me. There are a few roof-overhung routes which are good fun, but literally just a handful of them.  Nevertheless, 'Kewa is the main (one and only) overhanging rock crag on the North Island.  The routes are pretty short, averaging about 6-8 meters, with very hard bouldery moves. The number of routes was limited - the guide book shows a lot more but many of them, especially those in the lower grade range, are overgrown, dirty and very clearly haven't been climbed in a long time. The routes that are climbed were all very enjoyable, some of them definitely top scorers. But after 4 days I had pretty much done all the climbable (non-dodgy/clean) routes below 7a, and I could count on my fingers the number of routes above 7a. The highest grade route is a 7c+.

Fire every night!
On the weekend lots of locals (mostly Aucklanders but also a few from other spots) joined us and were very friendly. The town Te Kuiti is only 5 mins drive from the campsite and has everything you need to stock up (supermarket and liquor store :).  I'd certainly recommend 'Kewa if you're in the area, especially if you climbing around 7b-7c as then you'll have enough variety to keep you entertained for a week or so (however if you're flashing or onsighting these grades then you'll probably run out of stuff within a matter of days).

Unfortunately we didn't get to sample any of the other North Island crags, but there is good info on the freeclimb website, and the locals on the forum of climber.co.nz were super helpful.


Tuesday, 9 April 2013

Rock 'n Roll vs Plastic Fantastic


That is a question I can answer without any hesitation - rock! Although I must admit my ultimate first choice is sunny rock :)

I started climbing quite late in my life - when I was at university at the age of 21. My best friend climbed and kept trying to get me to give it a go. Eventually I went with him to the university wall and loved it. I climbed for 3 months on plastic and then did a week-long trip up to Waterval Boven (Mpumalanga, South Africa).  It was after that week of climbing on rock that I was downright hooked :)

Jacobs Ladder - Table Mountain, Cape Town
We are super spoilt in South Africa with there being so much really amazing rock, and often no more than half an hour from your doorstep. I'm not sure if it’s because of this, but the South African mentality toward climbing back then was very laid back, the focus being on getting outside and having fun, with very little emphasis on plastic or training.  Almost every weekend we were out climbing on rock, and during the week sessions at the wall were light-hearted and just for feeding the addiction until the next rock adventure. There was never much structure or training focus. I am talking 14 years ago now and this has definitely changed since, but that was the vibe that I came into when I started climbing.

I sometimes wonder what might have happened if I had started climbing in a place where training was given more focus - would I have had the mental maturity to follow that approach and push myself, and ultimately achieve more with my climbing. Maybe, maybe not. But what I did get was 10 years of fabulous and memorable weekends spent with friends sitting round the camp fire, and climbing in some of the most spectacular locations on awesome rock!

Building a training frame in my garage
My first ever training session was 10 years into my climbing career after I had come over to live in the UK.  My first year in England was spent recovering from back surgery, so when I could finally climb again I had lost all of my fitness and needed time on plastic to slowly build this up in a safe and controlled environment. It was also going into autumn and I struggled massively with not being able to get out on rock due to wet and cold weather. 

It was hard to adjust to being limited to plastic though - this was completely different to the climbing lifestyle that I was used to.  Autumn came and I struggled massively with not being able to get out on rock due to cold and wet weather.  I soon realized that I needed something to keep me psyched through the long winter season and so decided to try do some training and a few competitions.

World Championships 2011
I absolutely loved applying myself to a training programme, feeling and seeing the improvements in my climbing.  I also thoroughly enjoyed competition climbing – I found it challenging to break into the correct mind frame for competition, having come from a long background of working routes for red-pointing.  Competition requires a lot more give-it-everything-you’ve-got-and-never-give-up attitude, as well as learning to control your nerves, and climb calmly but aggressively at the same time :)

Just 2 weeks ago was the start of a 7 month round-the-world traveling adventure for me!  It involves mostly just traveling, but of course there will be climbing.  The main climbing destination is USA, but we’re hoping to do a bit in New Zealand and Brazil too.  However there will be some very long breaks between climbing which I am still finding extremely hard to come to terms with.  And in the next 7 months I will probably only touch plastic a handful of times, if at all, which another fact that I am slowly working through - the main source of panic comes from worrying about how much strength and fitness I will lose.  On the flip side of course, when we do climb, especially in the USA, it will be continuously for a number of weeks so I’ll build up more specific fitness at the crags.

Happy on rock!
Overall I will always be a rock person - this is where my passion lies.  However, I do really enjoy a good session at the climbing or bouldering wall, and for training I find plastic very convenient and specific, so it certainly has its place :)


Sunny rock! Montagu, South Africa

Friday, 7 December 2012

Staying On Top


This past year has been an extremely difficult time for me.  Besides the obvious physical hurdles I've faced, it's the mental side that I'm really talking about here. November 2011 I was in PB shape, about to embark on a 3 month climbing-centric trip. I had succeeded in being selected for the senior GB climbing team and I felt ready and excited to participate in some World Cup comps in Europe.  And within the blink of an eye (and a sickening crack of the knee) it all came to a grinding halt.

As the months have passed and my routes on 8a have been dropping off, it has been a massive challenge to keep myself from feeling totally disheartened and despondent.  My strength and fitness have fallen away, along with my presence in the climbing scene, and it feels as though all my hard work and dedication has gone to waste.

But one can’t wallow in a pit of despair forever, and although I wasn’t able to climb, I was able to do some fingerboarding and campusing.  I’ve built a little frame in my garage with my two fingerboards mounted on, but it didn’t take long before the grips became too comfortable, even after adding weights, and I was seeking ways to make it more challenging.  Courtesy of Metolious, I added pairs of screw-ons which really gave my fingers a good work out.  After 6 weeks my fingers were stronger than ever and I was hanging off grips, with added weights, that initially I couldn’t even get established on.

Injuries come and injuries go, some take longer than others, and some take longer than they should.  But I believe if you keep your mind strong and thoughts free, nothing is impossible.  This year was not my year, but who knows what next year will bring.

I would like to say a massive thanks to my sponsors, Evolv and Metolious, for sticking with me despite my injury and the discouraging prognosis for getting back climbing again.  I may not have ticked any significant routes this year, but next year I’ll try to do you proud.


Saturday, 3 November 2012

What's at the top?


Climbing is a difficult thing to explain to someone who doesn’t climb.  They see it as an attempt to get to the top of some arbitrary route, and can’t understand why you would want to.  But it’s so much more than just the route.   

For me, climbing is freedom.  It starts with open skies and fresh air, gentle breezes and warm sun, sitting around fires chatting with friends that feel like family.  Then there’s the physical movement, like a dance that needs to be executed with perfection, the concentration and mental hurdles that must be overcome to achieve absolute commitment.  And finally there is satisfaction, a tired body and a clear mind ... complete contentment.

Karen Varga, Factor 15 (7c+), Rocklands, South Africa

Friday, 31 August 2012

Can I have another piece of chocolate cake?

 It’s Friday evening and I head round to my mates to watch a movie.  They order pizza for dinner, and the beers have already been cracked open.  Hmm, simple carbs, starch, melted cheese and saturated fat.  The little goodness my pizza does offer, in the way of 4 thin slices of green pepper and olives, has been grilled to a crisp and soaked in melted cheese.   Everybody digs into their pizza with great gusto and I wonder if I’m the only person in the room thinking these thoughts.

Don’t get me wrong, I enjoy a treat like pizza, fish ‘n chips and Ben & Jerry’s every now and again, but the point is that it is a treat, and when I have it I am conscious of the little good it’s doing my body.  It’s not even about keeping trim, although that does play a part, but mostly about giving my body the right things it needs to keep it healthy and happy.  

I recently read a book called “Foods That Fight Cancer”, and besides teaching me about the way in which some foods, or the particular molecules and substances in the foods, can actually help to prevent or halt the progression of certain cancers, it enlightened me as to the value of good food.  When we’re kids we were told “eat your carrots, they help you to see in the dark”, but as adults we almost seem to have forgotten those lessons, or think they don’t apply to us anymore.  There is a lot of focus on vitamins and minerals, and so many of us take substitute pills for these and feel that we’ve ticked all the right boxes.  But there is so much more that fruit and vegetables provide that a pill cannot.  

My new mindset is along the eastern attitude to eating which is that you eat for health, opposed to the western approach of eating purely for pleasure and fuel.  This doesn’t mean that I don’t have the occasional naughty McDs or a fat slice of chocolate cake, but I’ve changed my diet to include so many more vegetables and fruit, complex carbs (e.g. brown rice, quinoa, and sweet potato) and good fats (e.g. nuts, olive oil, avocado).  

An Olympic athlete takes their diet seriously, they ensure that before, during and after a training session they are giving their body everything it needs to recover, adapt and be ready for the next training session.  However the general mentalities of climbers tends to be quite the opposite – push your body to great limits, but eat whatever you can get your chalky hands on.  We expect so much from our bodies, and complain volubly when things go wrong, but we don’t think about giving back to our bodies!

It often comes down to education and advertising, for instance the belief that a bowl of pasta is a healthy meal.  Sorry to be a bubble burster, but unfortunately the pasta we buy in the supermarket today contains little in the way of health – it’s predominantly made up of refined white flour that contains almost no dietary goodness; it’s high GI, which results in a steep rise in insulin with the ultimate effect of increased fat storage.  A much better alternative would be brown rice, or if you really love your pasta then at least get brown pasta.  

The main point I’m making is that considering how much we push and demand performance from our bodies, it’s worth making the effort to ensure that you’re putting the right things back in!
 
So on that note, here’s an awesome banana loaf recipe that I’ve come up with, taking bits from a number of different recipes and changing the ingredients to suit what I wanted.  It’s mostly made of bananas, got no added fat or sugar, but to give it that little something special I add dark chocolate chips (60% cocoa).  It’s super easy to make, and I have a number of friends who can vouch for its extreme deliciousness!


Karen’s Super Banana Loaf

Ingredients
  • 6 medium / 5 large bananas
  • 2 eggs
  • 2 cups wholemeal flour
  • 1 ½ teaspoon bicarb of soda
  • 2 teaspoon cinnamon
  • 1 teaspoon vanilla essence
  • ½ cup raisins
  • ¼ cup dark chocolate chips

Mash the bananas.  Add the rest of the ingredients and mix it up.  Grease your banana loaf dish and pour the mixture in.  Bake at 160° Celsius for 80 minutes.